Nanoleaf Competitors and Other Gaming Streaming Peripherals Explained
Scroll through Twitch for five minutes and you’ll see it: the same pastel glow, the same triangle panels behind every Valorant or CS2 player. Nanoleaf basically became the “streamer starter pack” wall. But here’s the thing—your setup doesn’t have to look like everyone else’s, and it definitely doesn’t have to cost Nanoleaf money. Between cheaper panel brands, crosshair tools, key marketplaces, and some very unsexy but important hardware choices, you can build a setup that looks clean on camera and doesn’t fall apart mid-stream.
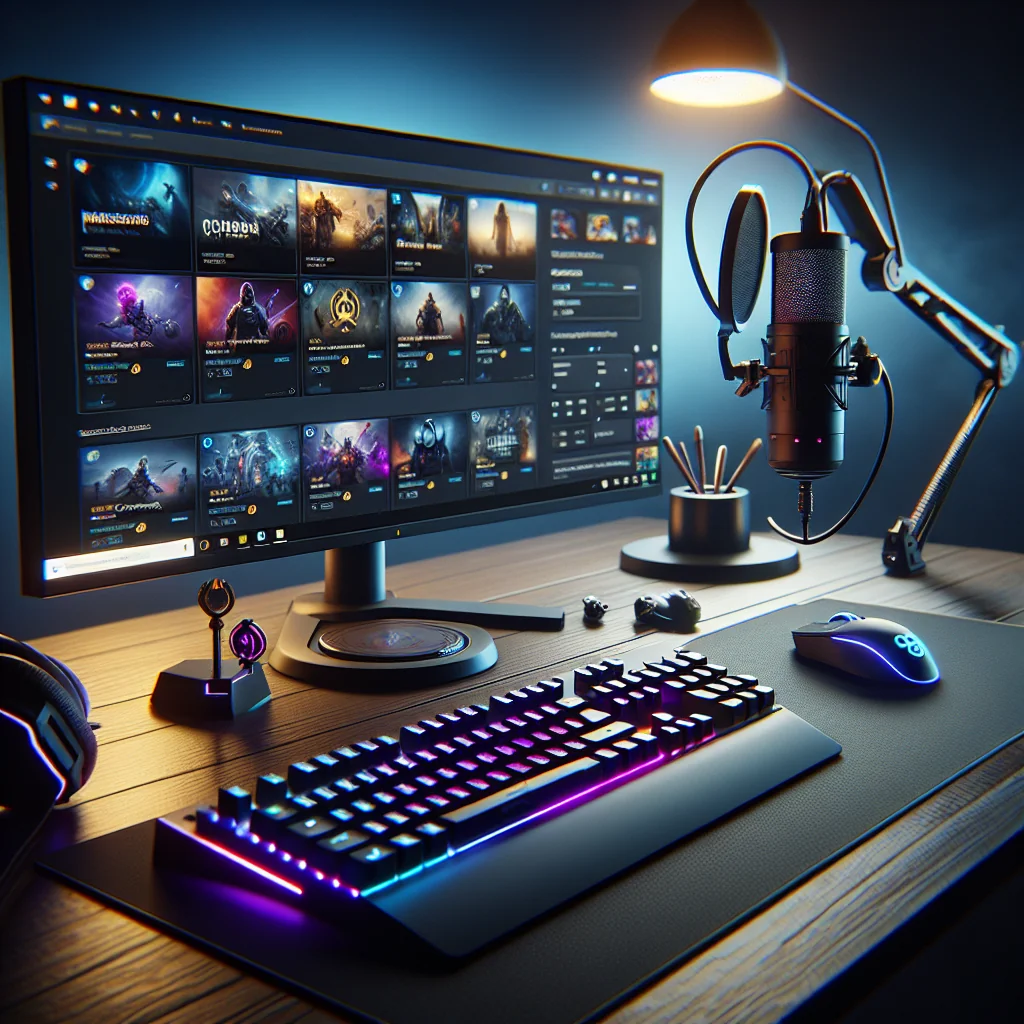
Nanoleaf Alternatives for a Stream-Ready Background
RGB wall panels are basically the neon “OPEN” sign of gaming streams. Viewers see the glow and instantly know, “Yep, gamer lives here.” Nanoleaf might be the brand that blew this up, but it’s far from the only option now. There are knockoffs, competitors that are actually better in some ways, and completely different lighting styles that still give you that soft, colorful backdrop without the Nanoleaf tax.
When you’re picking an alternative, don’t just ask, “Does it look cool in the Amazon photos?” Ask: how annoying is the software, will the adhesive rip my wall off, and does it actually look good on camera at ISO levels that don’t turn your webcam into a grainy mess? You want lights that you can change quickly, won’t randomly disconnect mid-stream, and don’t flicker like a horror movie when your GPU spikes.
Key Types of Nanoleaf Competitors
Most of the “Nanoleaf but cheaper” world falls into a few buckets. Some are worth it. Some are pure regret-in-a-box.
- Budget RGB panels – The “TikTok made me buy it” version of Nanoleaf. Fewer effects, clunkier apps, but they’re cheap and can look surprisingly good if you keep the patterns simple.
- Smart light bars and strips – Think behind-the-monitor glow or tall bars on each side of your desk. Less geometric, more “color wash” across the wall. Great if you hate lining up panels for an hour.
- Hex and triangle panel sets – Direct clones and rivals. Same idea as Nanoleaf: snap-together shapes, usually with their own app and music sync modes that you’ll use once and then forget.
- Desk-focused lighting – Small bars, key lights, and mini-panels meant to light your face instead of the wall. Not as flashy, but these do more for your camera quality than people realize.
If you care about how your stream actually looks, a simple combo works best: some kind of colorful background (panels, strip, whatever) and a soft key light in front of you. Honestly, a mid-tier panel set plus a cheap softbox will beat a $400 wall of Nanoleafs and no front lighting, especially if you avoid rainbow vomit and stick to one or two colors that don’t nuke your exposure.
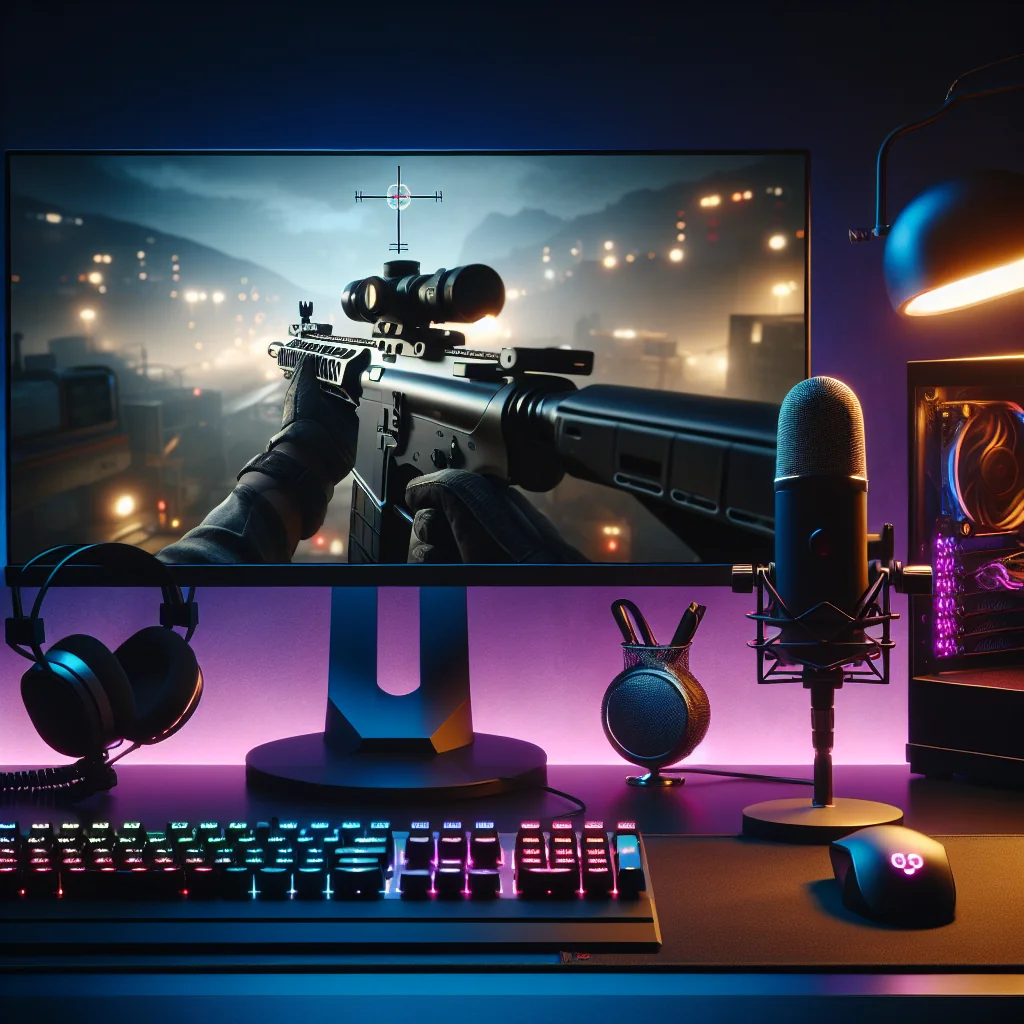
Valorant Crosshair and Fluorescent Looks on Stream
Valorant players will argue about crosshairs like it’s a religion. But if you’re streaming, you’re not just picking a crosshair for yourself—you’re picking one your viewers can actually see through Twitch compression. That’s where all the “fluorescent Valorant crosshair” talk comes from: bright, glowy colors that don’t disappear the second the bitrate dips.
On your own monitor, a thin white crosshair might feel crispy and clean. On stream? It turns into a ghost. Bright cyan, neon green, and hot pink tend to survive the pixel mush that platforms add. They also make it easier for people to pause your VOD, copy your settings, and feel like they’re “stealing your secret sauce,” even if you know it’s mostly aim training and copium.
Practical Tips for Valorant Crosshairs
If you want a crosshair that works for both you and your audience, stop overcomplicating it. Clarity first, ego design later.
- Pick a loud color: neon green, cyan, or a bright pink that doesn’t blend into map textures.
- Keep it simple and static—no wild movement, no dancing outlines, just something stable and easy to track.
- Skip ultra-thin outlines; they look great at 1440p native, then vanish at 1080p 6k bitrate.
- Hop into a custom and test it on bright walls, dark corners, and smoke edges while watching your own VOD back.
Once you land on something that feels right, add a !crosshair
command in chat with the code. Viewers will ask for it anyway, and you might as well save yourself from typing the same answer 40 times a night.
CS2 Crosshairs and Pro Settings for Consistent Aim
CS2 is a little different from Valorant, but the core idea doesn’t change: your crosshair should be boring, predictable, and easy to follow. That’s why everyone copies pro configs. It’s not that ZywOo’s settings give you his aim—if only—but they do give you a starting point that isn’t total chaos.
Most CS2 “pro settings” bundles include crosshair style, viewmodel tweaks, sensitivity, maybe even resolution. Copying them won’t magically turn you into a demon, but it will stop you from running a huge, bloated crosshair and 3.5 sens on 800 DPI because “it feels fast.” From there, you can nudge things around until they actually fit your muscle memory.
Using CS2 Pro Settings and ZywOo Settings as References
People spam “cfg?” or “ZywOo settings?” in chat for a reason—they want something proven so they don’t have to reinvent the wheel. That’s fine, as long as you treat those configs as templates, not commandments.
If you borrow ZywOo’s setup (or anyone else’s), be upfront about what you changed. List your sens, DPI, crosshair, and viewmodel in a panel or a !settings
command. Viewers like knowing you’re not hiding some “secret config,” and it saves you from repeating the same answers every three rounds.
Is Eneba Legit and Other Game Key Marketplaces
At some point everyone hits that moment: staring at a $70 Steam price and then seeing the same game on Eneba or Gamivo for half that. Then the brain goes, “Okay, but is Eneba legit?” and down the rabbit hole you go. Fanatical, Green Man Gaming, G2A—on the surface they all look like “cheap game stores,” but they don’t all work the same way.
Some of these sites are basically regular stores with official keys. Others are closer to eBay for game codes, where random sellers list keys from who-knows-where. That difference matters. One model usually comes with proper support and fewer horror stories; the other can be totally fine… until a key gets revoked six months later and you’re mid-series on stream.
Websites Like G2A and G2A Alternatives
When people search for “websites like G2A,” what they usually mean is, “I want cheap keys, but I don’t want my account nuked.” Marketplaces can have insanely low prices because keys might be region-swapped, bulk-bought, or just coming from gray channels nobody wants to talk about.
Before you roll the dice, at least check seller ratings, refund policies, and recent user reviews. If a brand-new AAA game is 70% off and nowhere else is close, that’s a red flag, not a miracle. For streamers, losing access to a game mid-season is brutal—it can mess with sponsorships, scheduled content, or that ranked grind your viewers have been following for weeks.
Bronze vs Gold PSU and Other Core Hardware Choices
Power supplies are the least glamorous part of your build, which is probably why so many people cheap out on them. You don’t see them on camera, they don’t have RGB (usually), and nobody in chat has ever typed “nice PSU bro.” But when your PC randomly restarts in the middle of a hype moment? Yeah, that’s when the bronze vs gold PSU conversation suddenly feels very real.
The difference isn’t magic performance; it’s mostly efficiency and build quality. A solid bronze unit from a good brand is fine for a mid-range rig. A decent gold unit, especially if you’re running a power-hungry GPU and streaming for hours, will usually run cooler, waste less power, and be a bit quieter. Less heat, fewer weird crashes, fewer “sorry guys, PC scuffed” moments.
Dominator vs Vengeance: Corsair RAM for Streamers
The Dominator vs Vengeance debate is basically: do you want your RAM to be a fashion statement or just quietly do its job? Dominator is the fancy line—heavier heatspreaders, flashy RGB, higher-bin kits. Vengeance tends to be the “shut up and work” option that’s cheaper and still fast enough for almost everyone.
From a streaming perspective, capacity and speed matter way more than the logo on the stick. Thirty-two gigs of mid-range Vengeance will feel better than sixteen gigs of blingy Dominator in almost every real-world scenario. If you’ve got the budget for high capacity and still want the “look at my RAM” aesthetic, sure, grab Dominator and match it to your lighting. Just don’t sacrifice actual performance for pretty sticks.
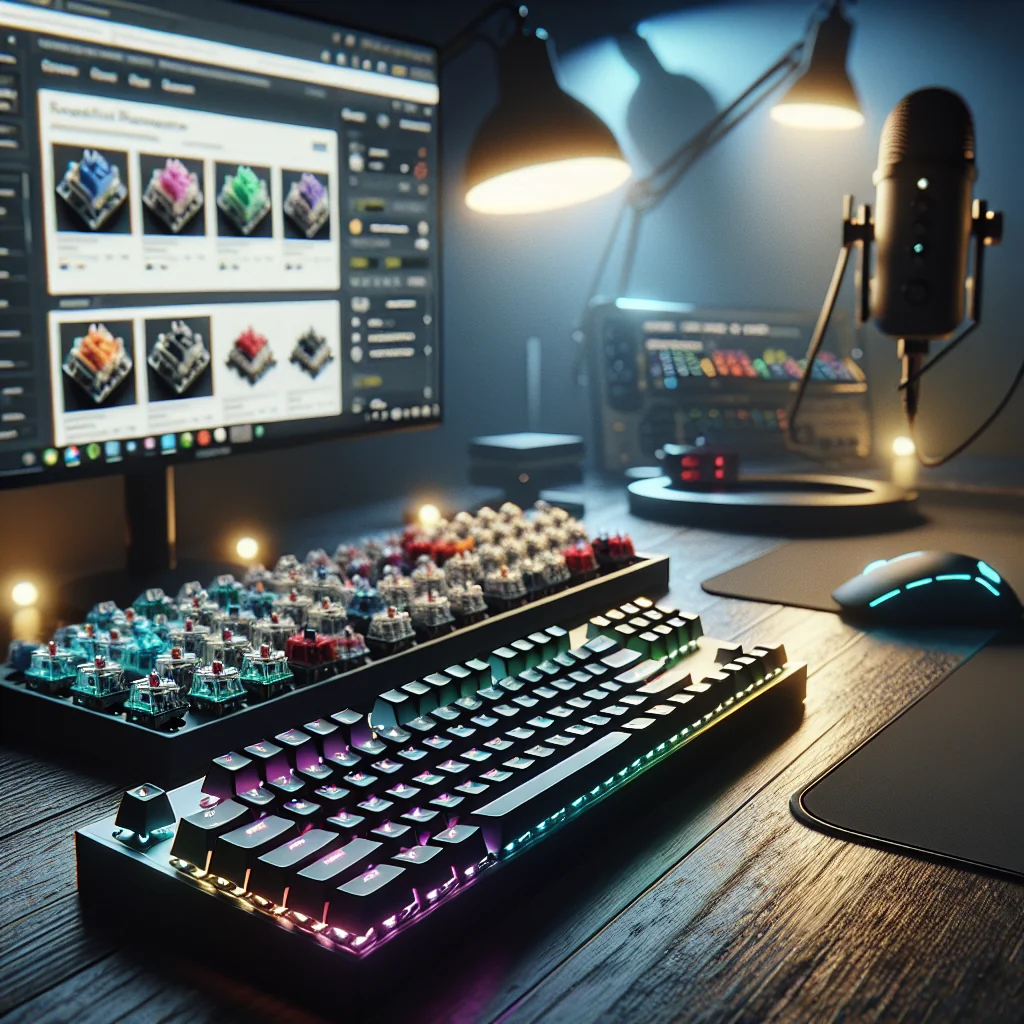
Keyboard Feel: Cherry MX Red vs Black, Switch Shops, and Stabilizers
Keyboards are weirdly personal. To chat, they’re part of your brand—the sound, the color, the way your spacebar thunks or rattles. To you, it’s the thing you slam every time you whiff a shot. That’s why arguments about Cherry MX Red vs Black, the best place to buy keyboard switches, and which stabilizers don’t sound like a toolbox get so heated.
Reds and Blacks are both linear, but they don’t feel the same. Reds are lighter and easier to actuate, which a lot of FPS players like because you can feather movement keys without thinking. Blacks push back more; they can help if you tend to fat-finger keys when you’re nervous, or if you just like that heavier, more deliberate feel.
Best Place to Buy Keyboard Switches and Stabilizers
Where you buy switches depends on how deep you want to go down the custom keyboard hole. Big retailers will have the usual gaming brands and mainstream linears. Smaller, niche shops carry all the weird stuff TikTok keeps recommending: silent tactiles, ultra-smooth linears, limited runs, and so on.
For stabilizers, look for screw-in sets with decent reviews, then lube them properly—yes, it’s annoying, but it makes a massive difference. A well-tuned spacebar that goes “thock” instead of “clack-rattle-squeak” is nicer for you and way less obnoxious for your viewers. Your mic will thank you.
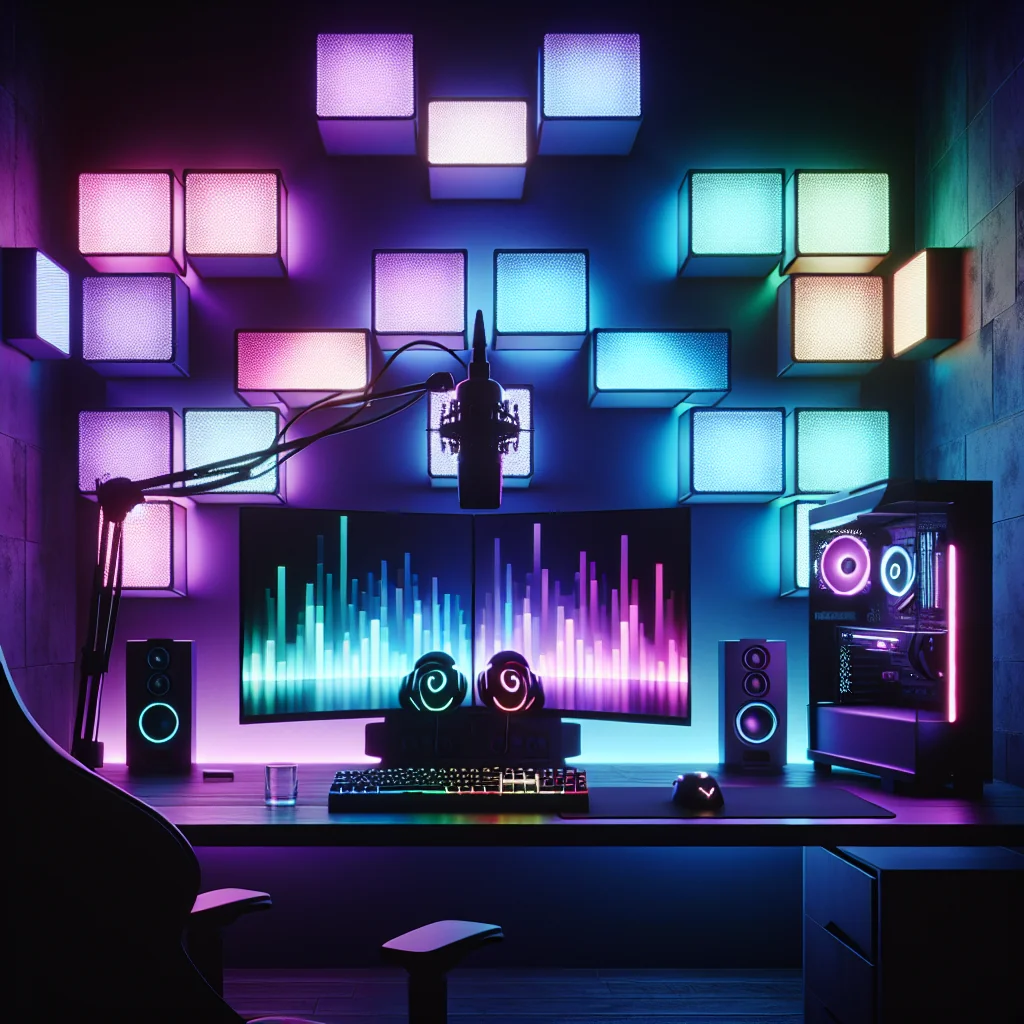
Mouse Pink, RGB Themes, and Matching Your Lighting
Color themes sound like fluff until you see how much they affect your overall vibe. A pink mouse, for example, isn’t just “a pink mouse.” Paired with pastel keycaps and softer lighting, it turns your whole setup into something recognizable at a glance. People remember it. It shows up in thumbnails. It becomes part of your identity.
If you go hard on one accent color—pink, teal, whatever—try to keep everything else calmer. Neutral case, simple wall, and then one or two matching colors in your panels or strips. Nanoleaf competitors that let you save custom scenes make this easy: one preset for “streaming,” one for “just chilling,” and you’re done. No need to run full rainbow unless you’re specifically going for that arcade chaos look.
Fan Curve Calculator and Cooling for Quiet Streams
Streaming doesn’t just stress your brain; it stresses your hardware. Extra CPU load, sometimes GPU encoding, more heat, more fan noise. If your mic keeps picking up a jet engine every time you alt-tab, your fan curves are probably scuffed.
Using a fan curve calculator or your motherboard’s fan control software, you can set fans to ramp up gradually instead of jumping from “silent” to “leaf blower” in two seconds. For a streaming PC, it’s usually better to be slightly more aggressive on GPU cooling—those things get hot fast—while letting your case fans rise in a smooth, predictable curve. Then do a test stream, listen back to your VOD, and tweak until the noise fades into the background.
Quick Comparison: Nanoleaf vs Nanoleaf Competitors for Streamers
Here’s a quick snapshot of how Nanoleaf stacks up against the usual alternatives from a streamer’s point of view. Treat this as a rough guide, not gospel—specific brands can punch way above or below their weight.
Table: Nanoleaf vs common Nanoleaf competitors for streaming setups
| Feature | Nanoleaf | Typical Competitors |
|---|---|---|
| Price per panel | Generally higher, aimed at the premium crowd | Lower to mid-range, more budget-friendly kits |
| Shape options | Triangles, hex panels, light lines | Hex, squares, bars, strips, and assorted clones |
| Software and effects | Polished app, solid presets, decent integrations | All over the place: some barebones, some surprisingly feature-rich |
| Camera appearance | Bright with good diffusion, easy to tune for webcams | Can match Nanoleaf, but diffusion and color accuracy vary by brand |
| Smart home support | Wide support for major ecosystems | Ranges from “just the app” to full smart home integration |
Before you commit to covering a whole wall, test a small layout with your actual camera and your usual lighting. Some cheaper panels look fantastic on stream once you dial in exposure; others blow out into white blobs or flicker on certain shutter speeds. The name on the box matters less than what your viewers actually see.
Putting It All Together for a Clean Streaming Setup
All of this—Nanoleaf competitors, crosshair choices in Valorant and CS2, game key sites, PSUs, switches, fan curves—sounds like a pile of unrelated details. But they all feed into the same thing: how stable your stream is and how “put together” it feels to someone who just clicked in.
Step-by-Step Path to a Streamer-Ready Rig
If you don’t want to blow your budget on pretty lights while your PC wheezes in the background, build things up in a sane order. Something like this:
- Sort out game access first: buy from official stores or reputable key retailers so you’re not gambling your main game on a sketchy marketplace.
- Pick a decent PSU and enough RAM to handle both the game and your encoder without stuttering.
- Dial in your input gear—switches, stabilizers, mouse—so it feels good and doesn’t sound like a construction site on mic.
- Set clear, bright crosshairs in Valorant and CS2, and add chat commands so viewers can copy them without derailing you.
- Then, and only then, start layering in panels, strips, themed gear (yes, even the pink mouse), and fan curve tweaks to polish the look and keep things quiet.
Do it in that order and you avoid the classic trap: a gorgeous background hiding a flaky, crash-prone system. Get stability and access handled first, then tune the details—lighting, colors, and audio feel—so your stream isn’t just pretty, it’s something people actually want to come back to.